love tip #6: get your knowledge on

Tags

, , , , , , , , , , , , , ,

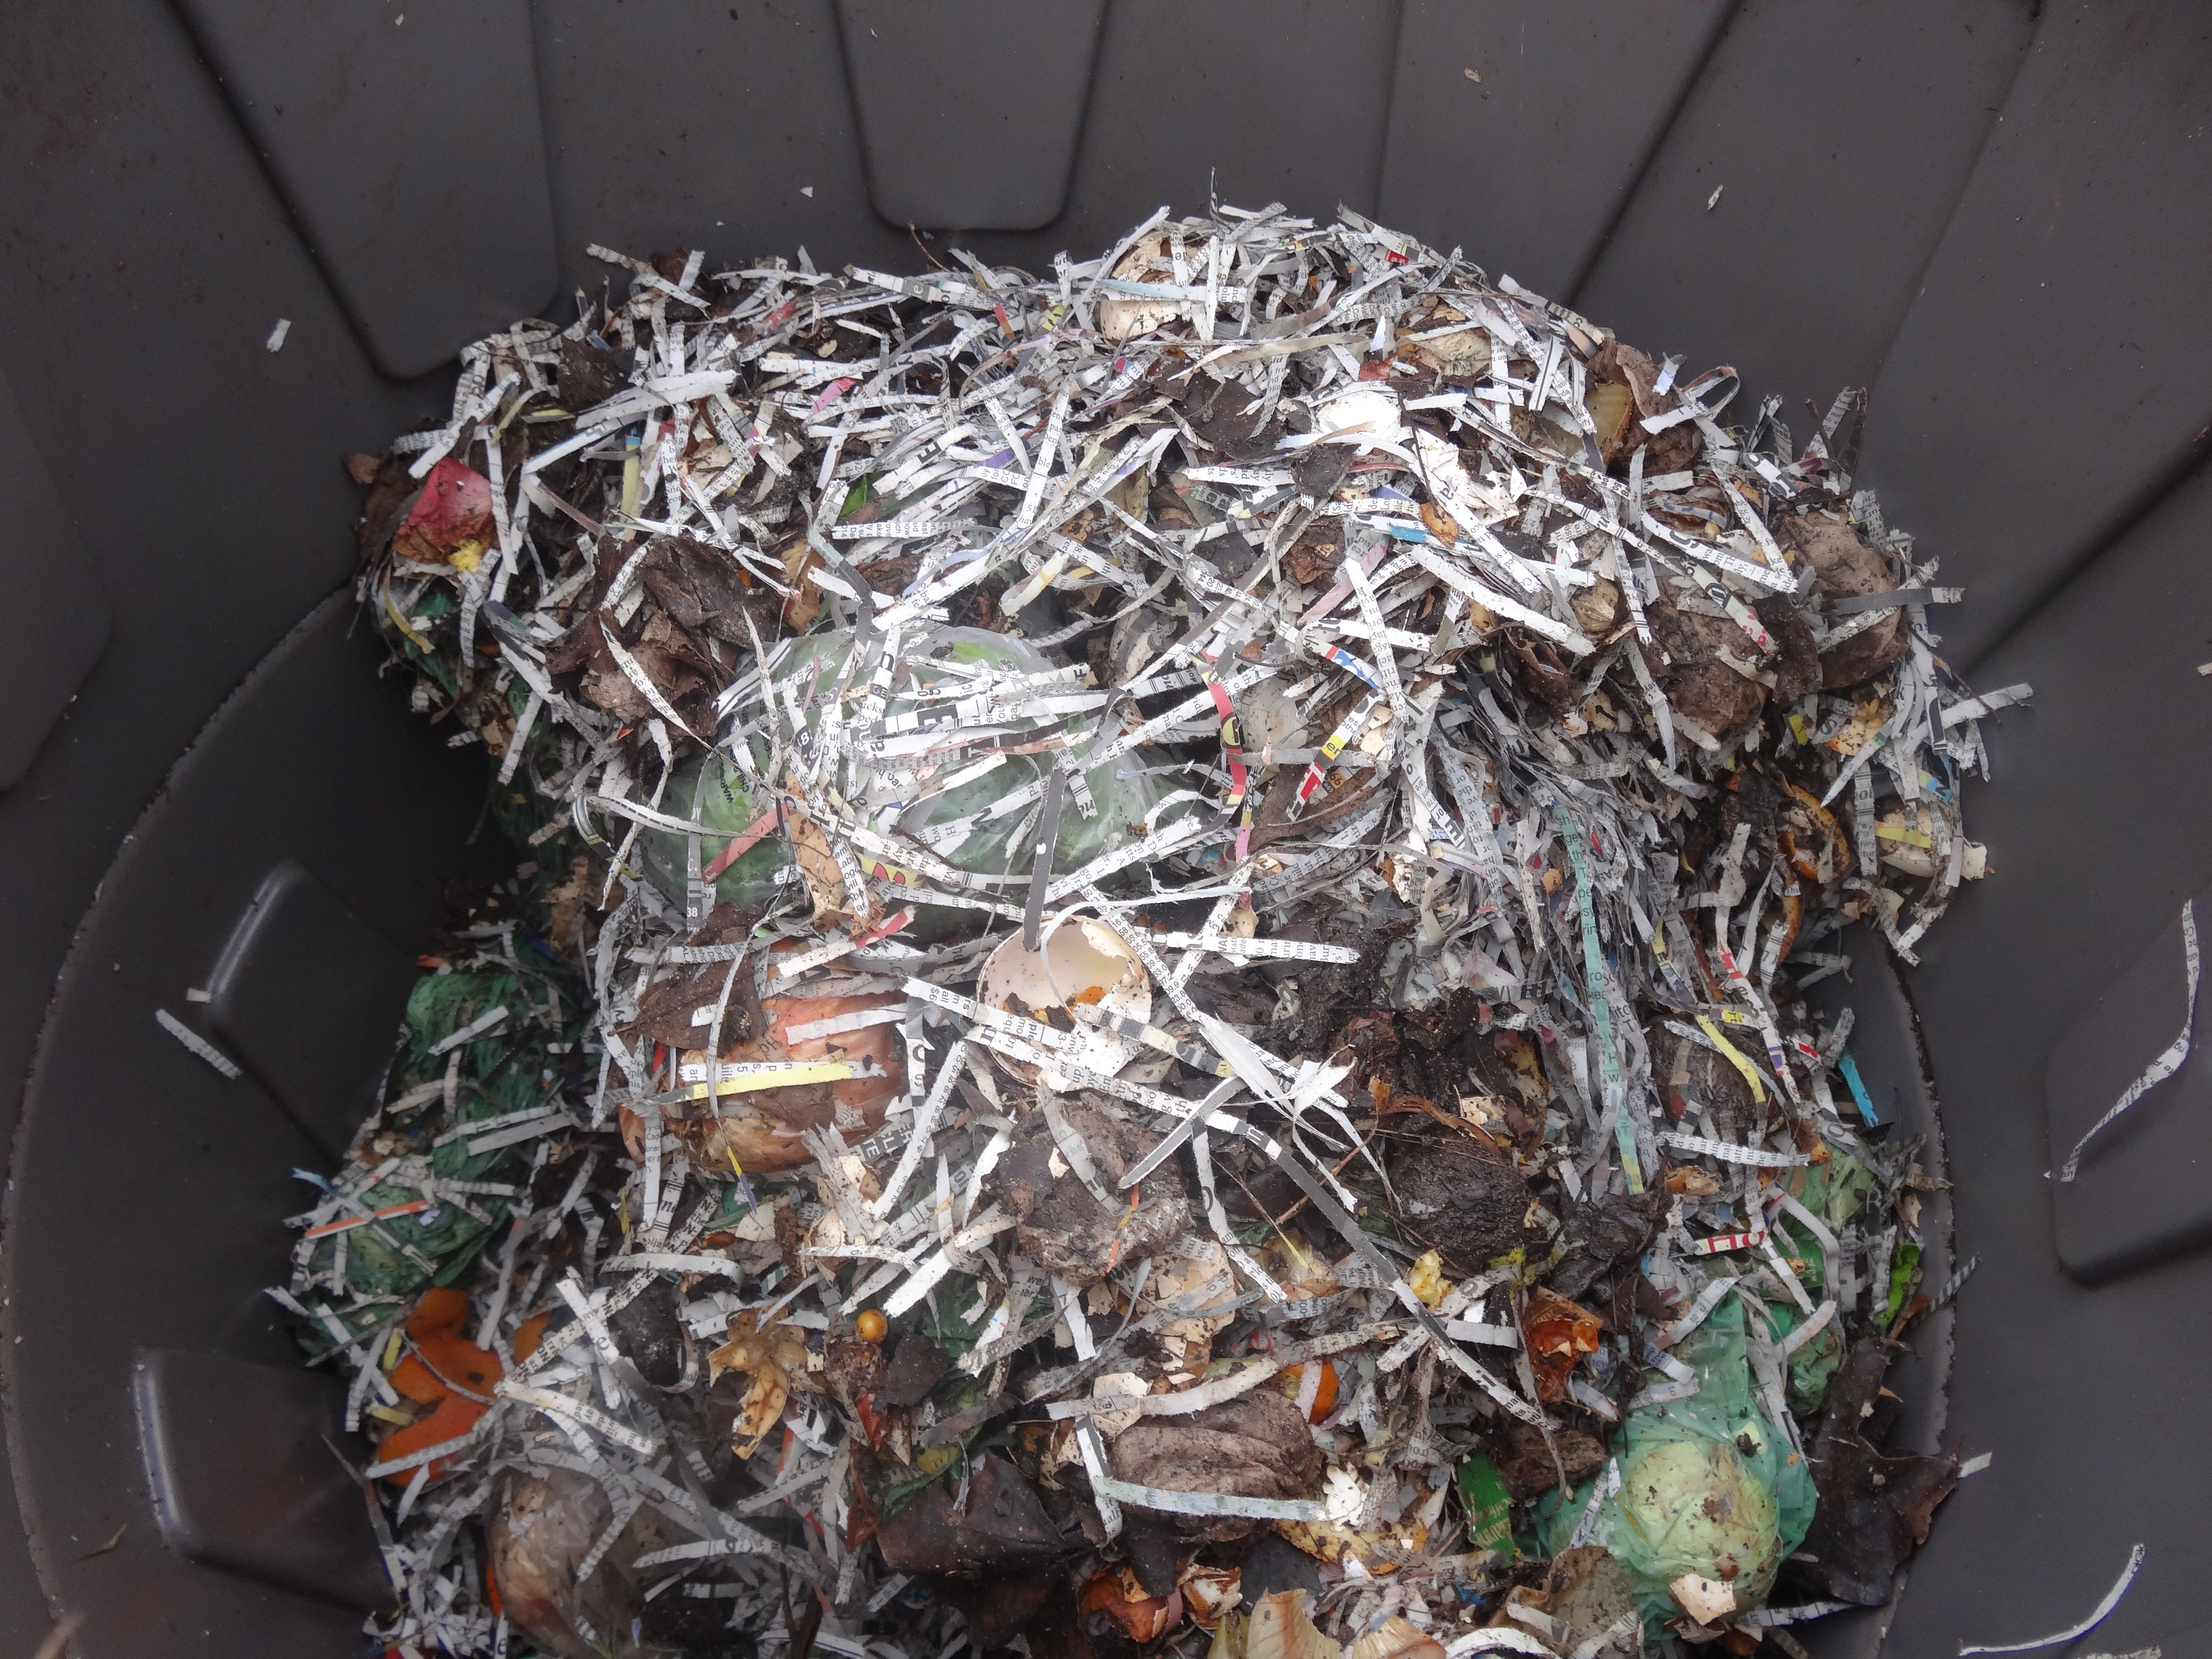
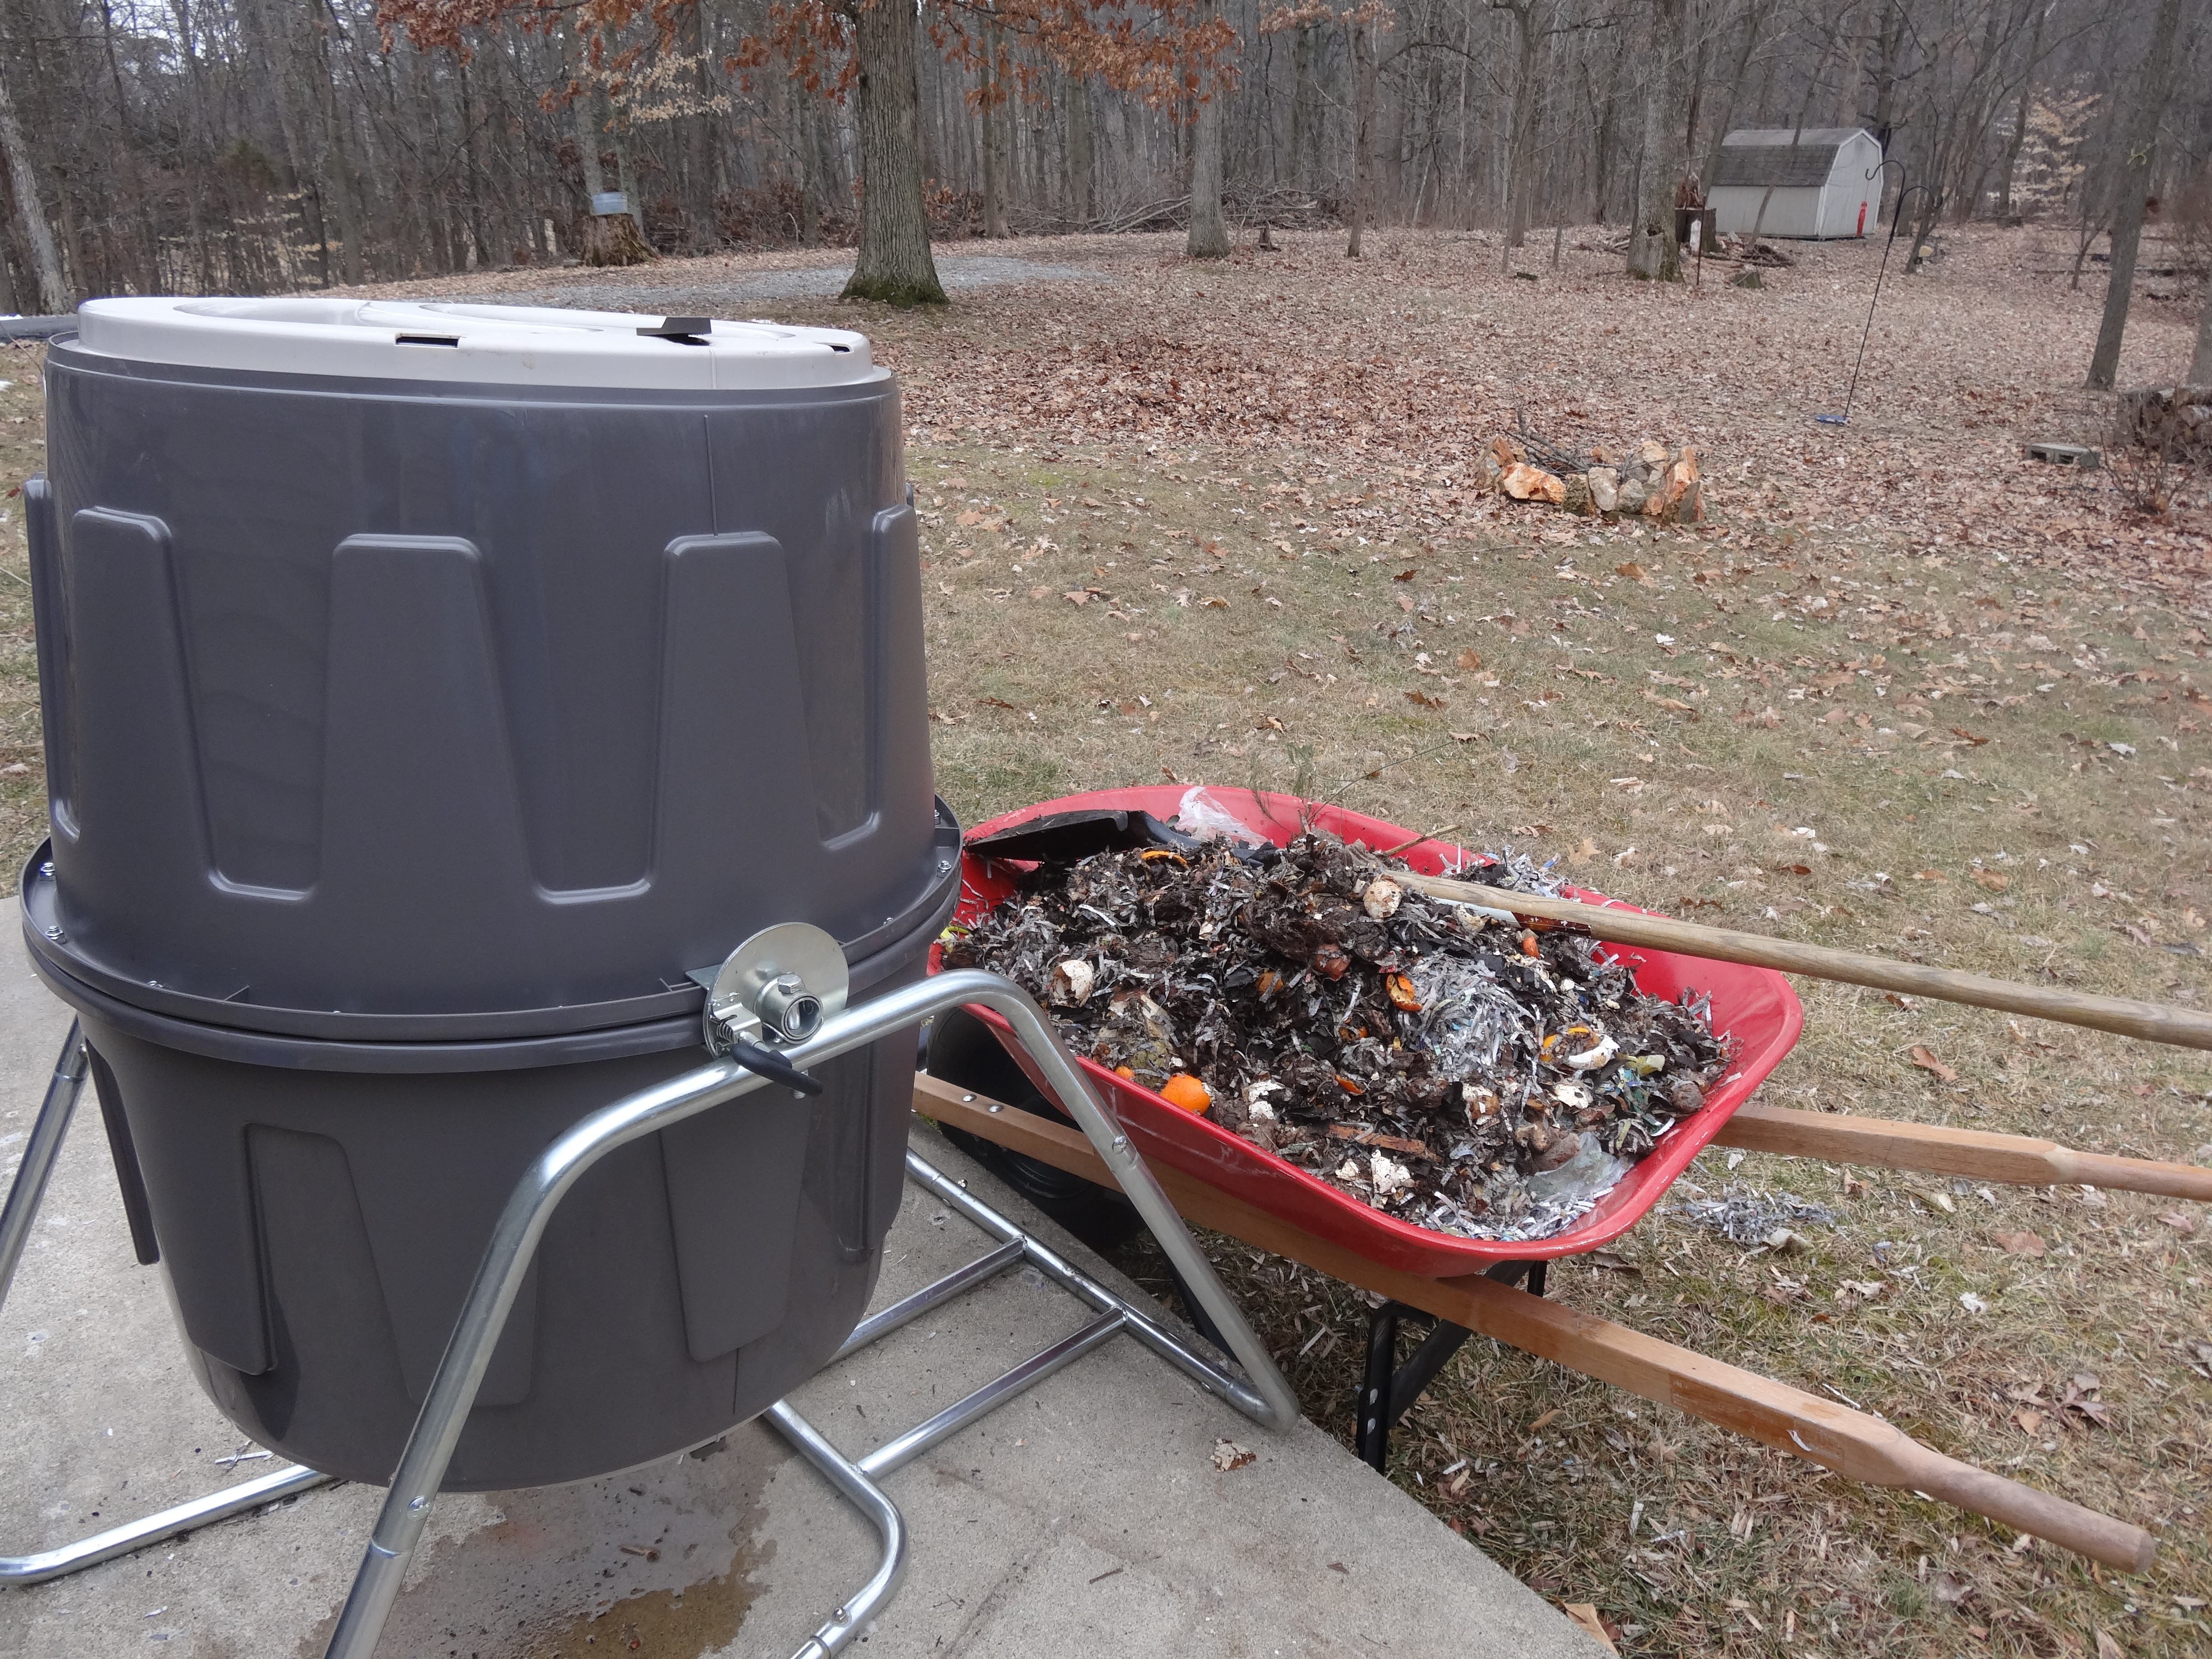
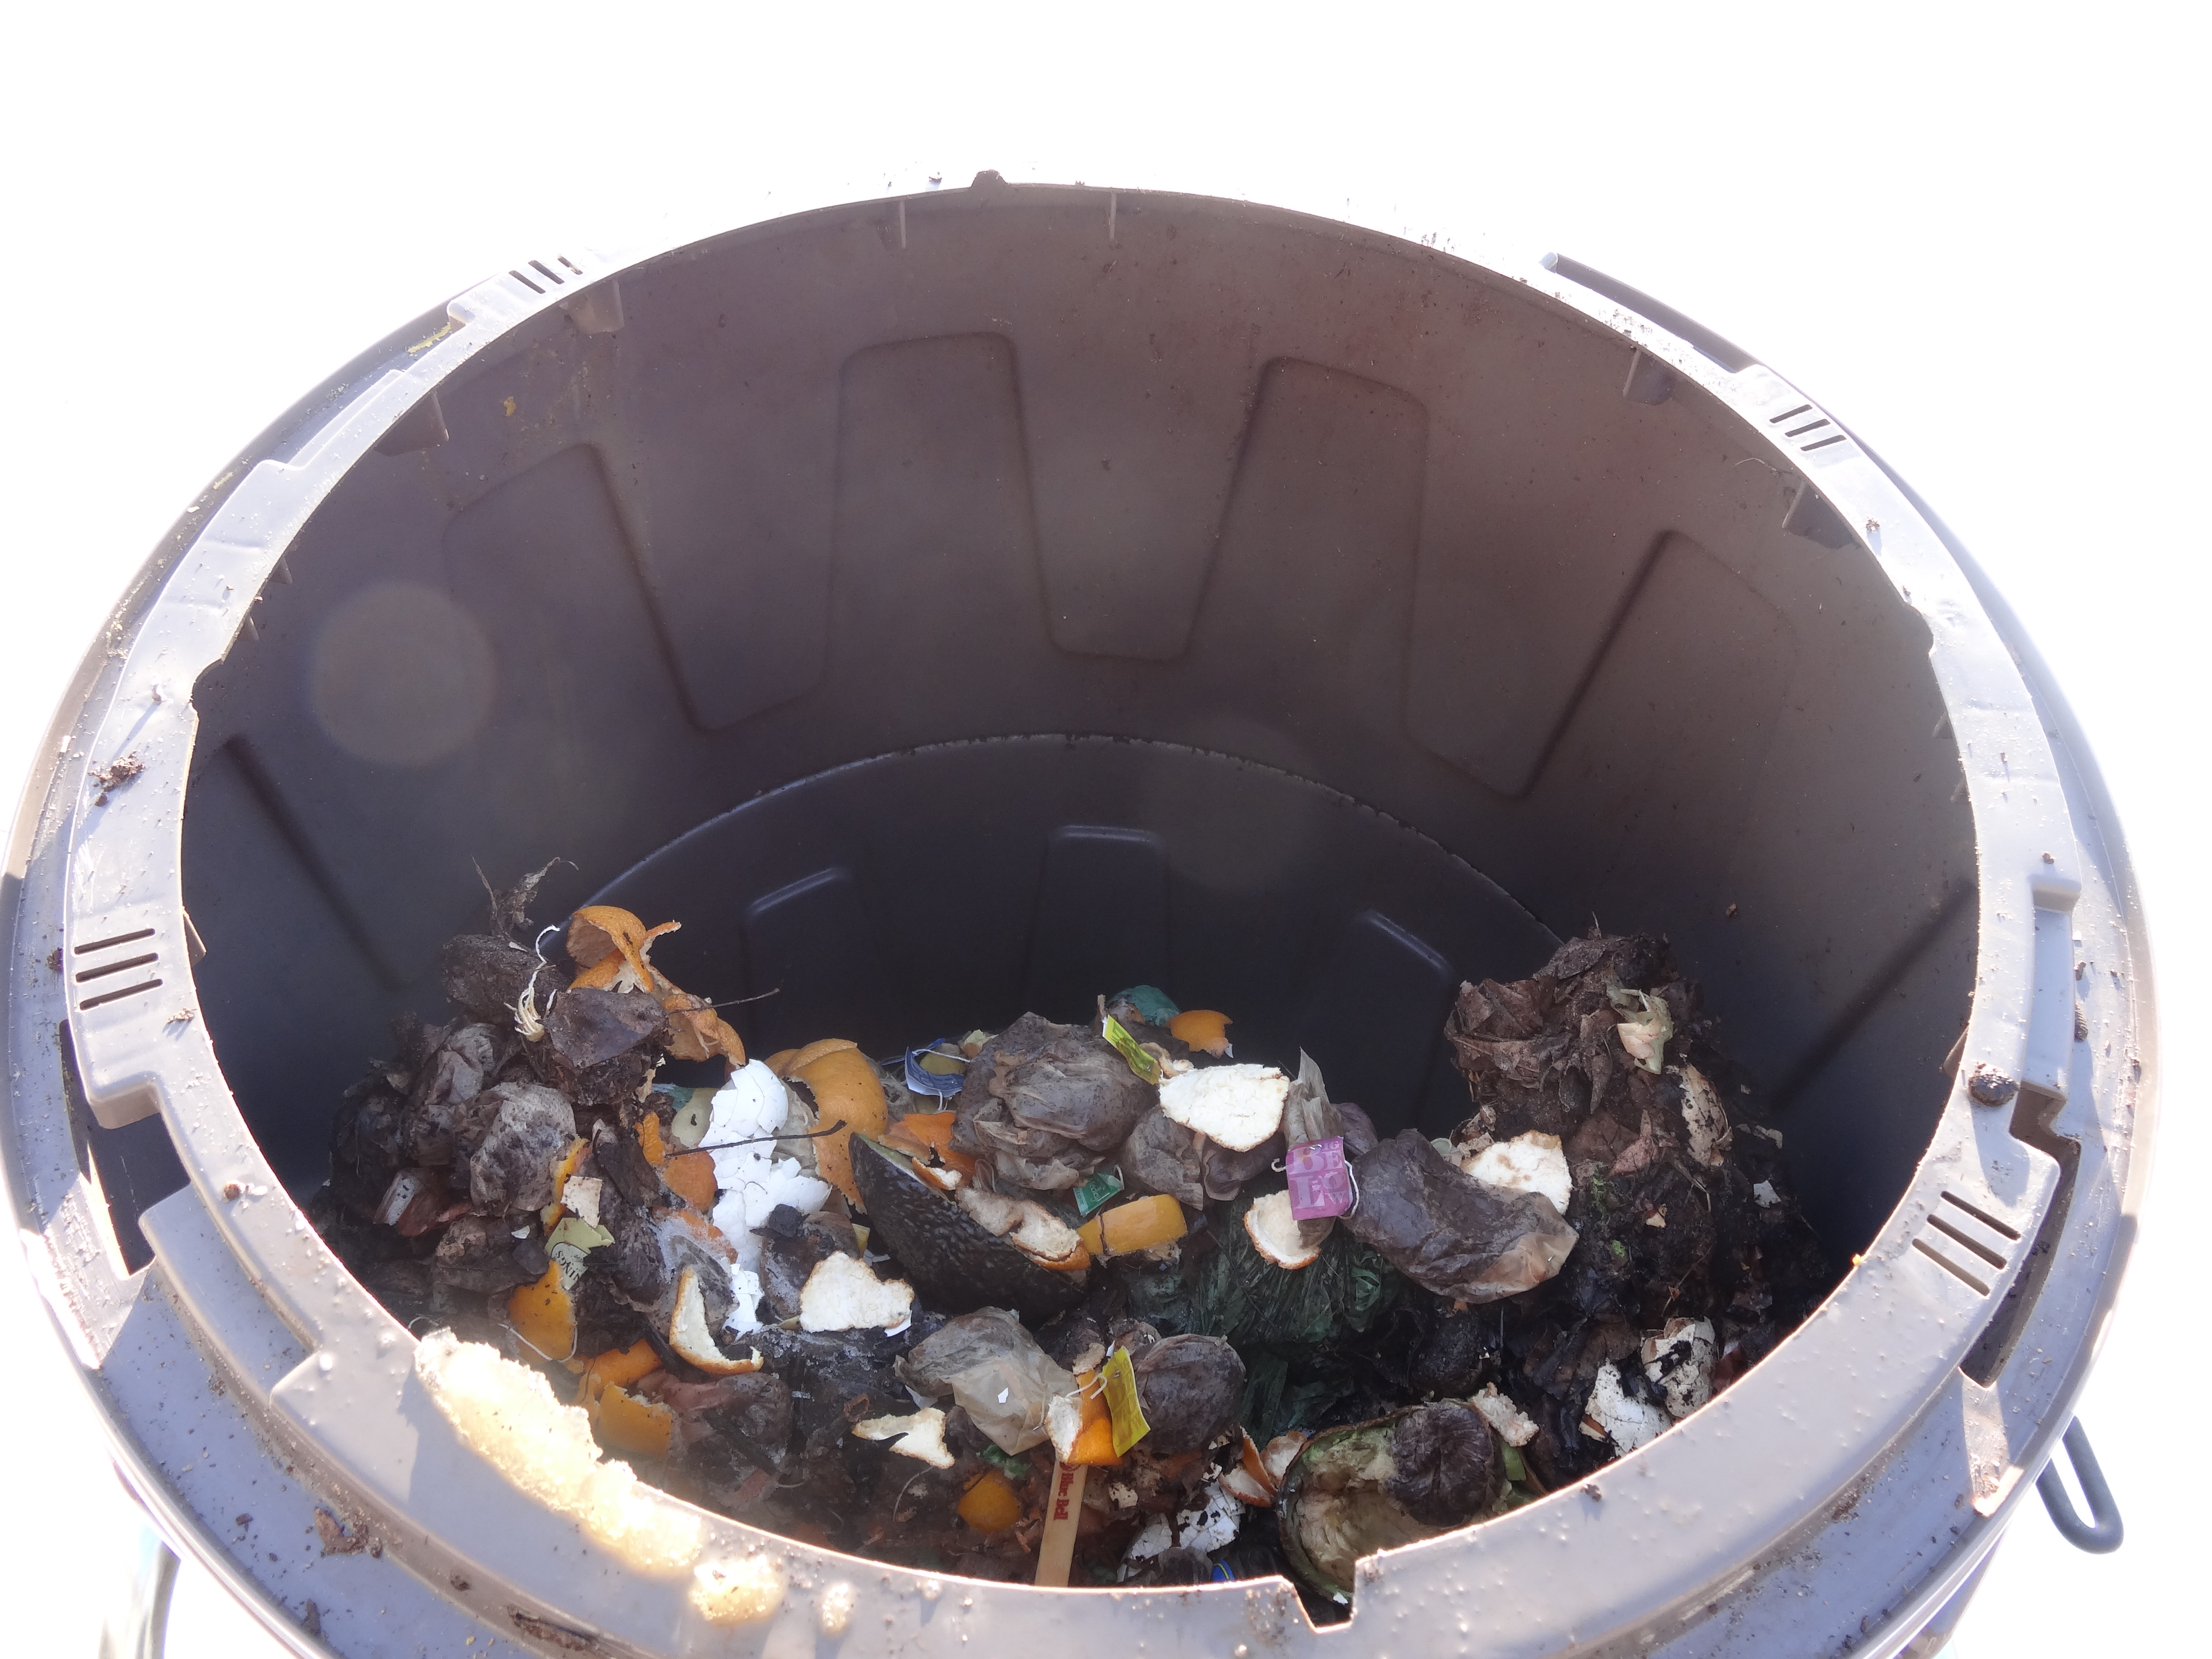
As a relative newcomer to permaculture, gaining knowledge for me is a must.  I’ve always been frugal and concerned for Mother Earth, but this is the first time since leaving high school that I actually have the opportunity and intention to put at least five years of work into a set amount of acreage.  And although I plan to spend a year of the next five in Alaska, by setting fruit trees and hugelkultur (mound) gardening up, I can leave my property in the hands of someone else with just the care for perennials and animals once I have my bases established.

The Permaculture Handbook, Peter Bane
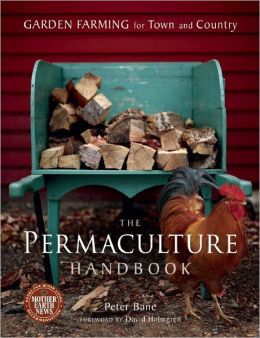
Forever the insomniac, my Nook is always at my bedside and ready for searches for new books and magazines to bring into my library.  One of my favorites is The Permaculture Handbook by Peter Bane.  Published in 2012, it has the knowledge of a permaculture pioneer with modern reflections on legal and other variables affecting modern organic farming and sustainability and forest farming.

My biggest take in the first year of farming my land?  Knowing how to begin and not getting too dedicated to a specific process.  While I of course have big dreams, Bane stresses keeping things close to the property’s existing buildings in the first years so as to keep the work close at hand.  And he says, if things do get left undone, don’t worry.  The seasons and other factors will start and stop projects as you develop, learn, change and grow with the process.

The Basics of Permaculture Design, Ross MarsSo, when you check it out, don’t get sticker shock!  The book is about $35 but it is also over 600 pages of in-depth knowledge from a renowned permaculturist and educator.

A second book in my favorites is The Basics of Permaculture Design by Ross Mars.  Although published earlier (1996), Mars focuses more on basics of sustainability within 160+ page length.

So get to it!  It’s never a better time than today to learn, practice and live the permaculture lifestyle.

delving into hugelkultur

Tags

, , , , , , , , , , , , , ,

***Update July 2014!  The ugly box to this beautiful hugelkultur planter!  The soil has sunken about 18″.  I plan to add my summer compost, a layer of soil and then top with straw for the winter.  I also have to reinforce the sides.  I get about five huge cucumbers a week from these 3 plants and there really are strawberry plants in there also (peeking out the slats.)  I trim the leaves about once a week but the growth is insane.  ALL ORGANIC, NO PESTICIDES OF ANY KIND, not even ‘organically approved’ pest repellants.  There are red ants that I have to fight with on one corner and a few chewed leaves, but nothing that has affected production.

Original post:

The minute I read about hugelkultur gardening, I knew that I had the perfect location ready and waiting to be developed.

When we moved to our home last year we decided to get as close to zero waste as possible.  The first step was finding out the recycling rules for our county and not setting up regular garbage pickup, thus forcing us to get back into the strong habit of analyzing every bit of product packaging coming into our home.

'recycled' garbage bin with the first hugelkultur layers

‘recycled’ garbage can bin with the first hugelkultur layers

For us, this meant that the ready-built garbage can bin no longer had a job.  We took the plastic trash cans and placed them in our sunroom with liners to collect plastic and cardboard recycling, leaving the outside bin empty and a bit of an eyesore.

But, being ever the gardener, I hoped to find a way grow vines around it without it collapsing in, and although most often in an open mound, the hugelkultur became the perfect solution.  And with spring looming, I had to get on the job so that the mound will have the requisite two months to settle before planting.

6 easy steps

step 1, a layer of logs and branches topped with leaf layer

step 1, a layer of logs and fallen branches topped with leaves

step 2, shredded newspaper added to rough compost

step 2, shredded newspaper added to rough compost (an easy way to double compost)

step 3, bin to barrow

step 3, bin to barrow

step 4, adding the compost layer with an extra layer of flat newspaper to disparage the racoons

step 4, compost layer with an extra layer of flat newspaper to disparage the raccoons

step 5, final leaf layer

step 5, final leaf layer

step 6, adding a soil layer

step 6, adding a soil layer (straw can be added to help hold the soil on open mounds)

While the steps can vary, I chose to use my winter kitchen scraps as compost and leaves from last fall that had already begun breaking down.  Another option is manure with–or instead of–compost or soil, whatever is readily available to you.

The key is to place larger items like logs on the bottom with smaller, plantable soil on top and after relatively little work, you are composting without the need to flip and turn and worry about temperatures.  Mother Nature will do all the work for you, and you get to grow crops during the process!

Promises to update with pictures at planting time!  Maybe clematis and strawberries?

Now, where am I going to put the asparagus …

love tip #5: organic vs. heirloom

Tags

, , , , , , , , , , , , ,

Do you know the difference?  Luckily I do, and last week a day of shopping with my son became a lesson on the true difference between organic and heirloom seeds and plants.

Gourmet Carrot Blend, Photo credit: Organic Seed People

Gourmet Carrot Blend, Photo credit: Organic Seed People

The first difference is in the age and development of the seeds.  Heirloom seeds typically have been passed down 50+ years and are from non-hybrid/GMO plants.  These plant types have grown and developed through natural pollination but may or may not have been grown organically.

Organic seeds have been cultured from either heirloom or hybrid plants.  The plant must have been grown chemical-free using natural compost and insecticides with soap-based sprays and bone meal allowed.

So can you grow heirloom and organic seeds in the same garden?  Yes, BUT, while the heirloom seeds will produce heirloom plants on first run, the resulting plants might be blended with the organic plants and will only remain ‘heirloom’ if both were originally.  AND, the organic seeds will only produce ‘organic’ plants if they are grown and nurtured organically to maturity.

How to make sure your heirlooms remain heirloom?  You need a buffer zone, basically acreage, between you and your neighbors farms and gardens to keep cross-pollination with non-heirloom plants from occurring.  This is a difficult process and the outcome from year to year can be unpredictable.

So look for organic heirloom seeds and if needed, purchases new seeds annually to ensure you are truly getting the best for your family.

Although many heirloom seed producers are not organic, and vise versa, growers such as Organic Seed People offers organic heirloom seeds.  (When visiting their site, be sure to scroll down to the link for ‘Organic Heirloom Seeds.”  The link will bring up three choices: Vegetables, Flowers and Herbs with multiple choices under each.  You must make sure that you don’t get into the wrong area by side-links or you might mistakenly purchase seeds that are not both organic and heirloom.)

* Please note, I do NOT receive compensation for links.  I am merely helping the process in finding viable sources and cannot guarantee products!

love tip #4: starting seeds indoors

Tags

, , , , , , , , , , ,

If you’re like me, you’re already itching to get summer crops growing even though the threat of frost is looming for another two months.  Indoor germination is a great idea, but only if you follow the rules.  Don’t and you will end up with weak starters that won’t survive the transplant to outdoors.  And for those not ready to build  a cold frame or a hot bed greenhouse, a simple set-up indoors will provide a more economical option to purchasing transplants.

photo credit www.gardeners.com

photo credit www.gardeners.com

When setting up a growing station, commercially purchased set-ups are always available, but it’s easier and cheaper to just purchase a two-bulb fluorescent lighting fixture, hooks and chains, hanging the lamp from a ceiling joist and making sure that the chains are long enough to adjust as the height of the plant changes.  Another option is to build a 2×4 or PVC pipe frame to hang the light fixture from.

Fluorescent grow bulbs are available (two 40 watt bulbs per fixture).  In a pinch, one cool white and one warm white bulb, both 40 watt, can be used.  But if you are like me, not only wanting to save money but also to actively be kinder to Mother Earth, LED grow bulbs are available for an eco-friendly option starting at around $50.  Remember that LED costs are higher upfront, but the savings in electricity and lifespan are unbeatable.

Plant seeds according to instructions, keeping the bulbs approximately 6-12 inches above plant height and soon spring will arrive and you’ll be ready to transplant those summer crops!

permaculture vs. master gardener

Tags

, , , , , , , , , , , , ,

Just … why?  I still don’t get the permaculture world vs. the master gardener world hate-thing going on around me.  I understand that master gardeners are trained in the use of chemical insecticides, but I also know from attending trainings that for both insect and wildlife nuisance, exclusion is always the number one choice.  Plus, no one is standing over me in my classes saying, “Hey you, you must use these chemicals!”  It’s insane.

So what does exclusion mean?  It means that if you don’t want deer eating your tulips, don’t plant tulips!  And if you don’t want rabbits in your veggies, plant hot pepper plants as barriers.  No, they don’t always work, but then nothing does.  Even trapping and killing only lasts until the next creature comes along.

Tulip Tree

Maybe it’s because I’m in a very rural county and our little class of nine students understands the value of saving nature and saving money all as one?  I’m not sure.  What I do know is that this fight is only hurting those unwilling to learn.  I know for certain that I’m not the only one in my course that sees “weeds” as beneficial foods and medicines.  It’s been open discussion in our classes!

I mean really, do you support every single thing you’ve ever been taught?  One of our instructors supported GMOs, that doesn’t mean that I have to.  And even though I don’t agree with some of her beliefs, I still gained some great in-depth knowledge on plant science from her.

Time to share some love people!

love tip #3: easy insect control

Tags

, , , , , , , , ,

It’s easy to tell that I love the wild birds on my property.  But did you know that they are a wonderful addition to your garden insect control?  Birds like house sparrows and starlings are often shunned because of their protective nesting natures, but you can use them to your advantage and now is the time to begin!

European Starling

European Starling

Offer a welcome mat in winter to wild birds by providing seed and suet so that when nesting time arrives, the birds will already see your property as a friendly haven.  Just make sure to do it correctly!

Place feed far enough from your house to prohibit birds from regularly landing and nesting directly on your home, or around kids’ play areas, by feeding them closer to your garden.  Before late winter/spring nesting begins, place bird houses in this same area.  Space them far enough out to prevent dipping at you while gardening, but still surrounding the area you most want controlled.

Voila, you are one with nature and a little less insect heavy in your garden!

love tip #2: kitchen composting

Tags

, , , , , , , , , , , , ,

Composting is a breeze when you have the right tools, but in the winter season many people neglect composting their kitchen scraps so as not to deal with the frozen earth.  Since I just moved onto my property in October and winter hit extremely early and hard, I don’t yet have a larger, outdoor open compost pit.

Instead, I bought a composting drum to use over winter for storing my kitchen compost which I will then transfer to a pit style compost pile in the spring.  To make it even easier for me, I moved it onto the back patio for winter since the frozen temps (and choosing the right scraps) will keep any smells at bay.

Rotating compost bin (both ends open)

Rotating compost bin (both ends can be opened)

Today we were lucky enough to get up to 35 degrees for the first time after weeks of sub-freezing temps and single-digit nights, so I was able to get the bin open and add a couple of bags of scraps.  (I keep them naturally frozen in my unheated garage when I can’t get the bin open!)  With the extreme temperatures and the bin being only about 1/2 full, there is still enough heat to keep the ice melted under the bin which means the process is working–even in winter!

My kitchen scraps

My kitchen scraps

Inside my kitchen, I use a kitchen composting crock with biodegradable bag liners (much better than cleaning out chunks!) and charcoal filters.  The crock works wonders while also looking nice on the counter and we have never been able to smell the contents, even when standing directly next to it.

So if you aren’t already, save those scraps!  You can feed much of it to the chickens, hogs or goats, or you can save it for the garden compost pile.

love tip #1: snow mold

Tags

, , , , , , , , ,

As a part of this blog, I thought I’d include what I’d like to call “love tips.” Of course the “love” here is for our environment!  Please enjoy!

love tip #1

According to Old Capital Golf Club Superintendent, Chase Best, many people are shoveling their snow the wrong way! If you’ve never heard of “snow mold,” let this be a first.

permie love tip #1Snow mold occurs when grass and plants are trapped under a heavy layer of snow for an extended amount of time, anywhere between 20-40 days. This might seem forever for some of us where the snow cycles, but it’s the shoveling in these areas that often causes the damage.

When shoveling or plowing snow, remember to alternate the locations where removed snow is piled in order to help prevent lawn diseases.  Although it might not snow again for weeks, temperatures can easily keep piled snow around for much longer.

Check out Spring-Green for more information on snow mold.

And it began with a click

Tags

, , , , , , ,

just out the back door

just out the back door

Welcome to my newest blog, permie love! As a student Purdue Master Gardener and the new owner of a beautiful six acre property, I’m ready to use my knowledge and love of nature to develop the world around me using permaculture,  benefitting both my family and the wonderful creatures amongst us.

So, let’s learn together!